An automated test is a list of recorded steps that you can save and run automatically multiple times, on multiple different devices. Automated tests allow you to easily create and save a sequence of test steps, creating more efficiency with repetitive and automated testing across various devices.
To create an automated test case:
Log in to your Sofy account.
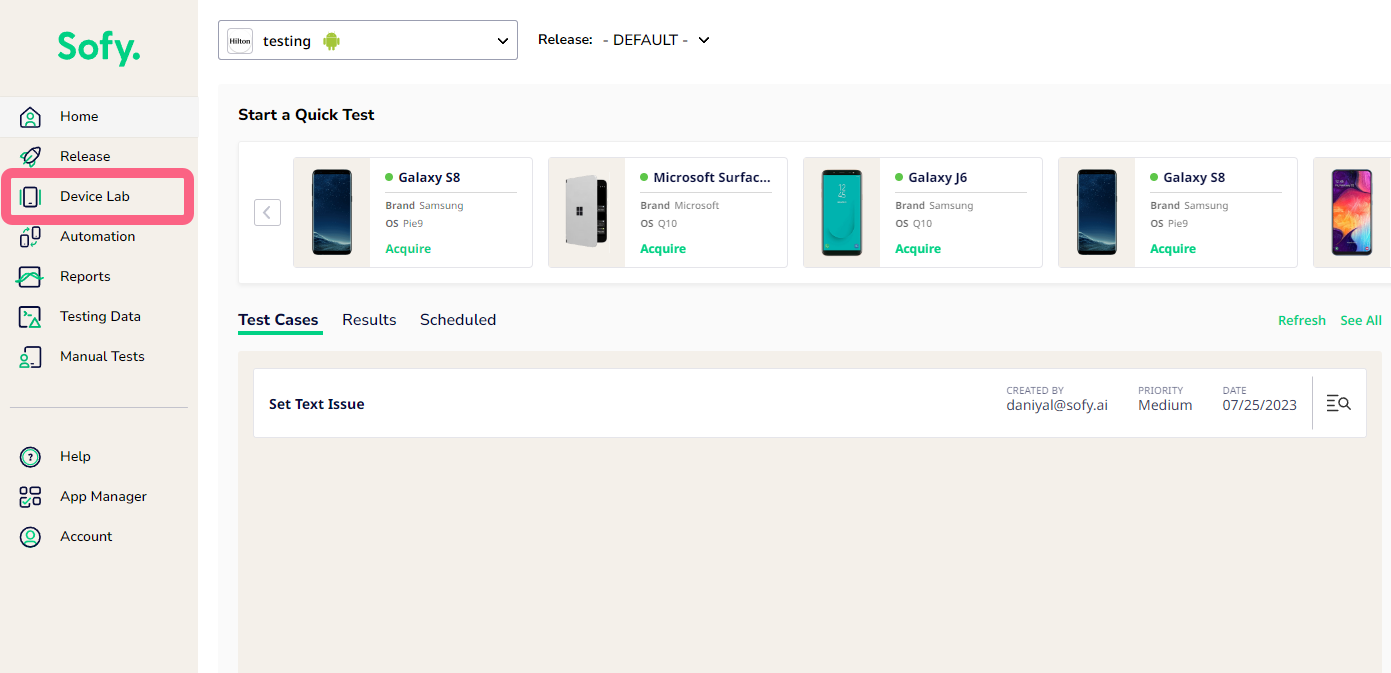
Select Device Lab from the left navigation bar.
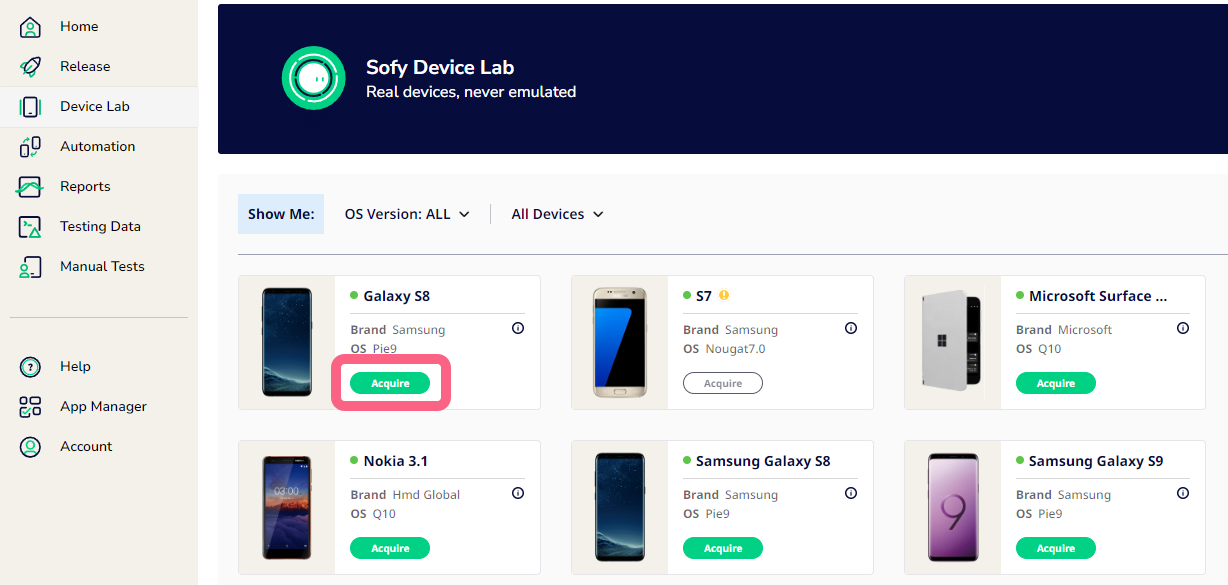
Locate the device you want to test, then select Acquire.Note: If a device is not available, the Acquire button will be grayed out.
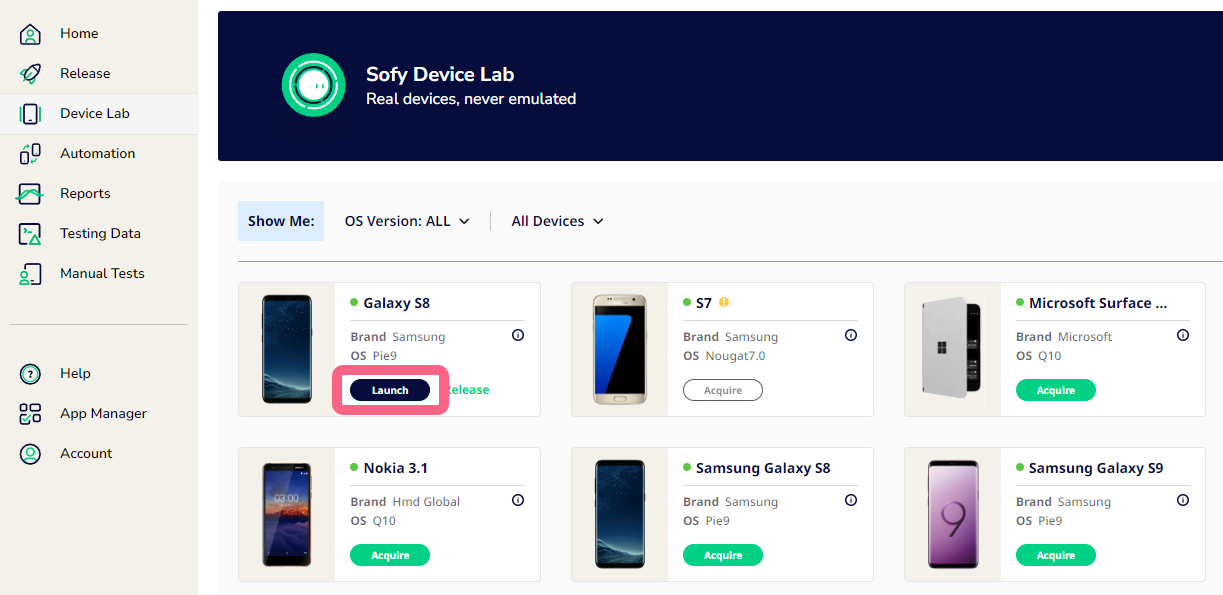
Click Launch to open the device in a new window.
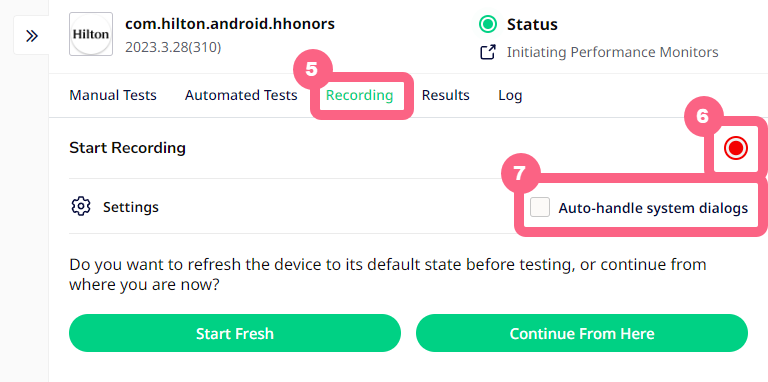
Wait for the app to install, then click the Recording tab.
Select the Start Recording red button at far right.
Check the Auto-handle system dialogs box to allow Sofy to automatically handle any system dialogs that pop up. If you wish to handle the system dialogs as part of your test case, leave this option unchecked.
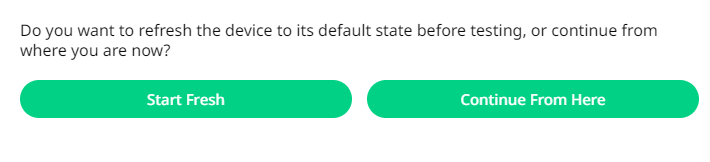
Select how you want to start the test:
Start Fresh: Refresh the device to its default state before testing.
Continue From Here: Record the test from the current state of the app.
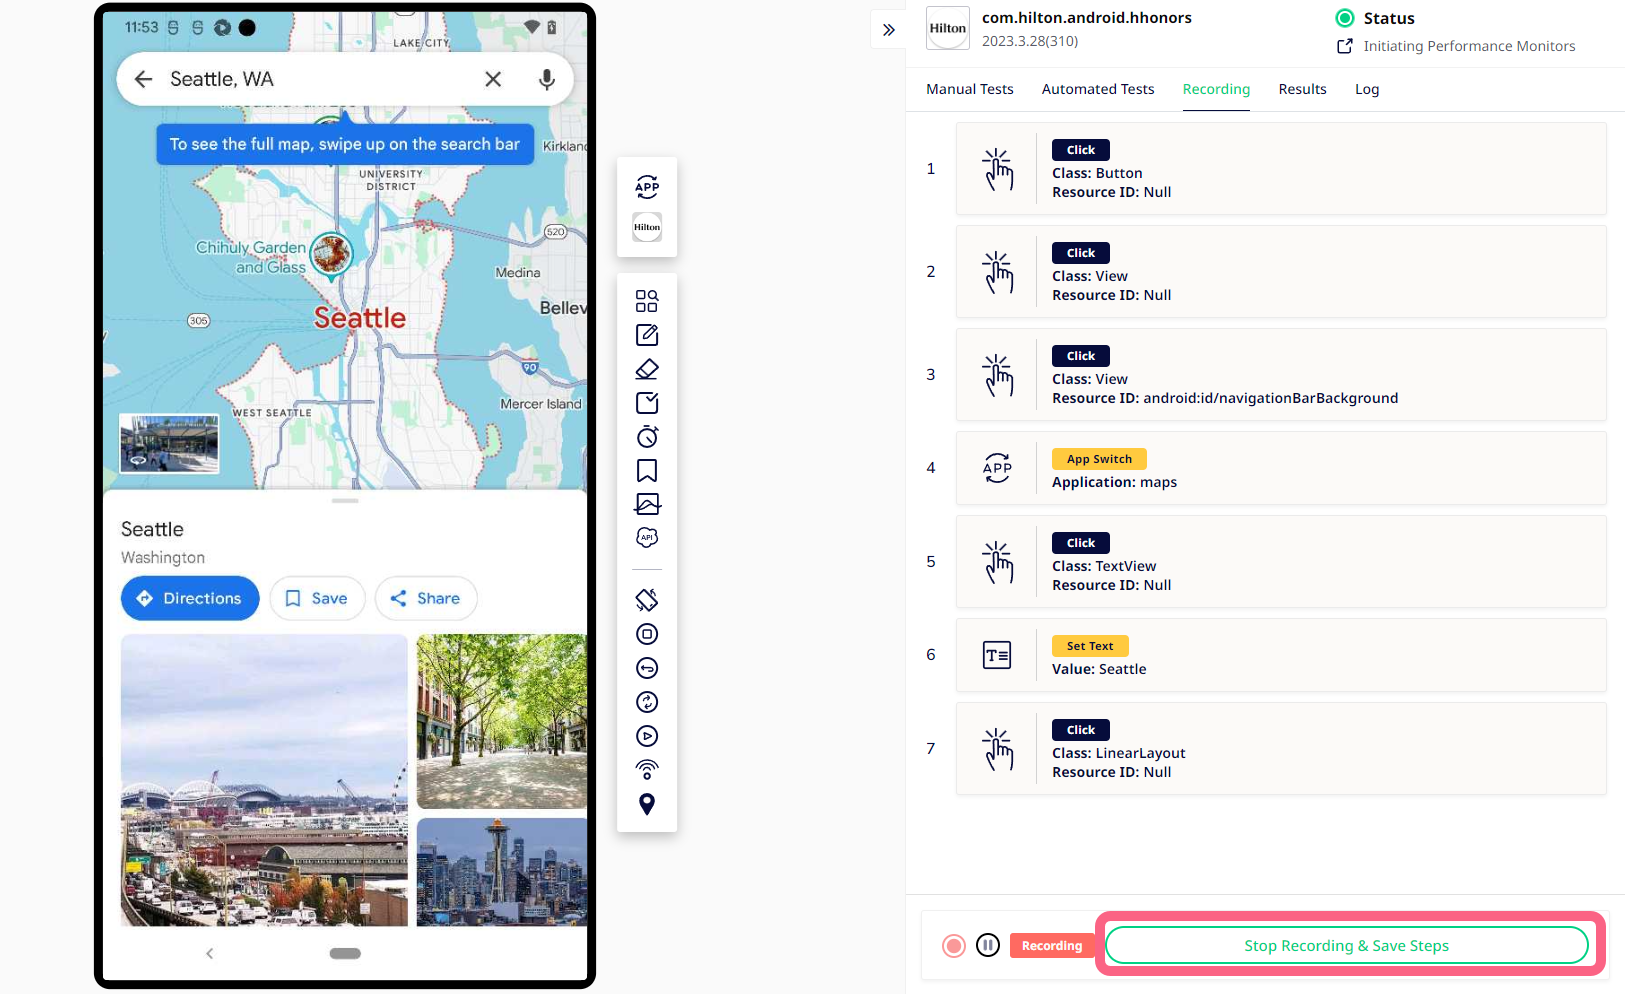
Interact with the device on the left and perform the desired actions in your app. Each step will be recorded and listed on the right.
Once you’re done recording your steps, click Stop Recording & Save Steps at the bottom of the page.
Choose Save as Test.
Name the test, set the priority, and add a description.
Click Add Tag(s) if you want to assign tags to the test. Type the tag name in the field, then hit Enter to add the tag.
Select Save as Test.
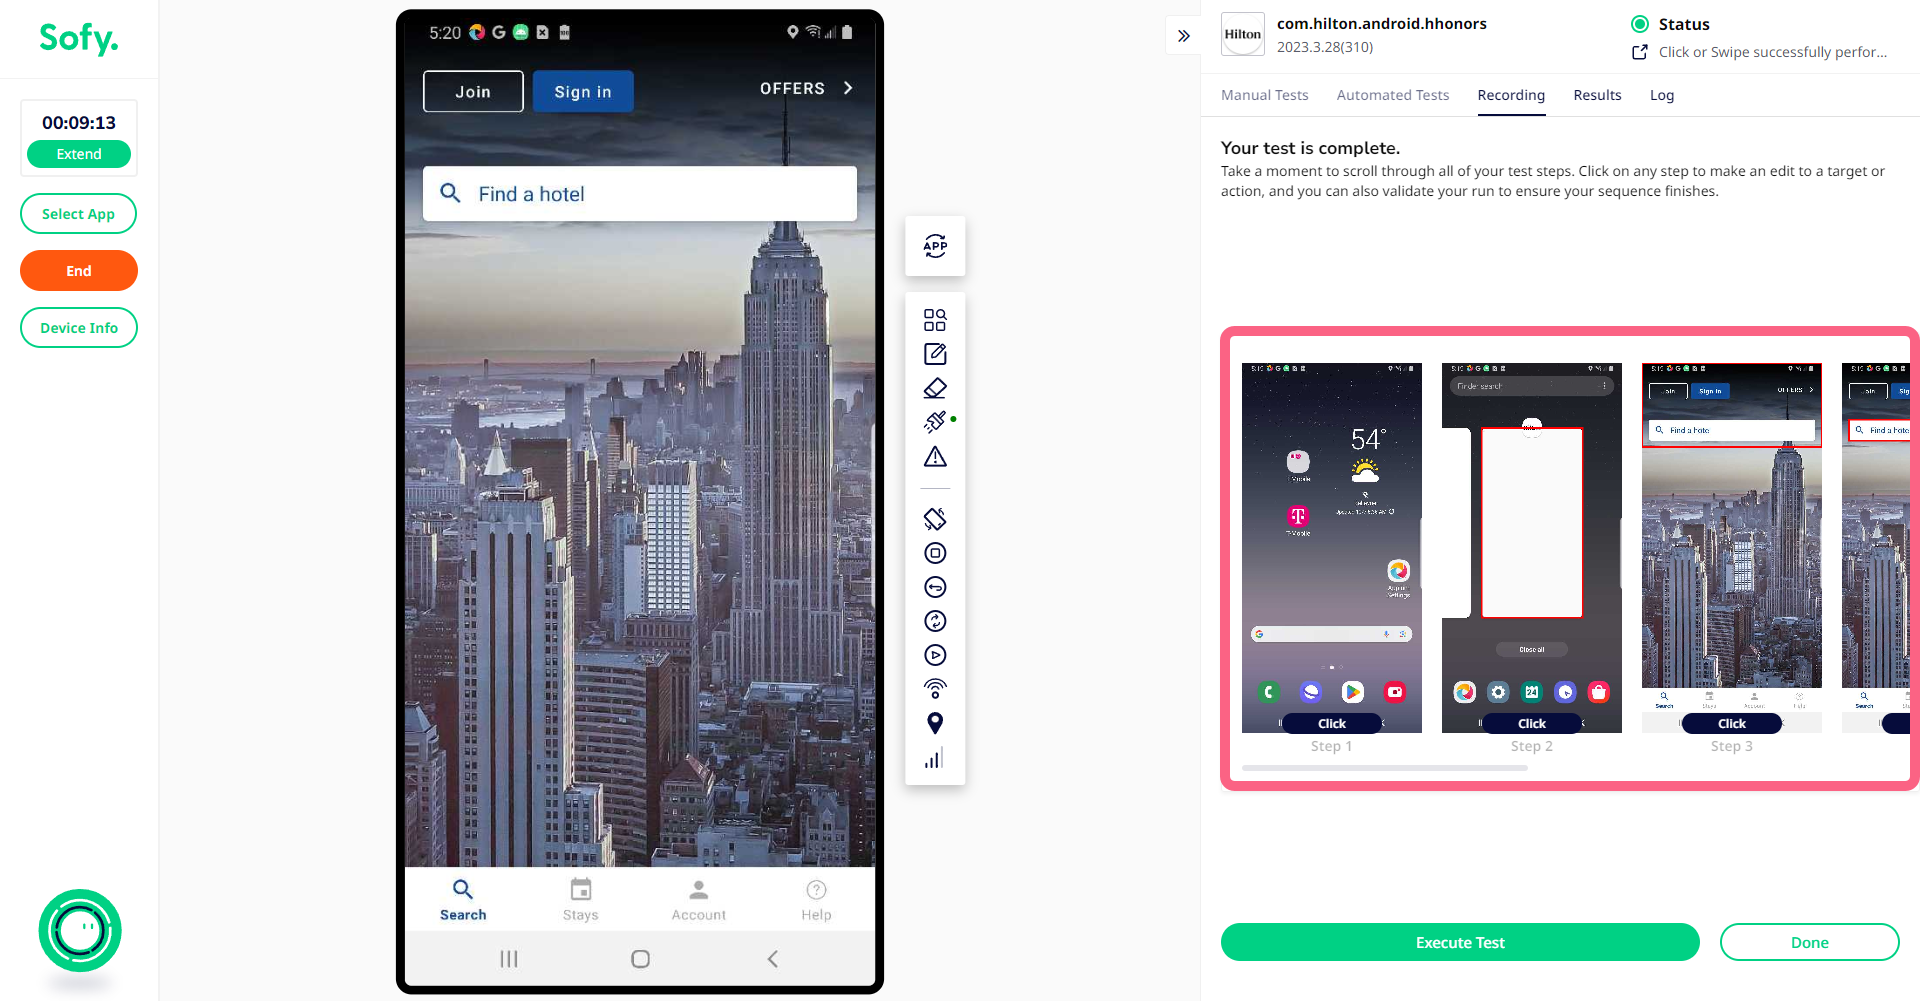
Once the recording is saved, scroll through the test steps and click on each step to edit a target or action and add asserts.
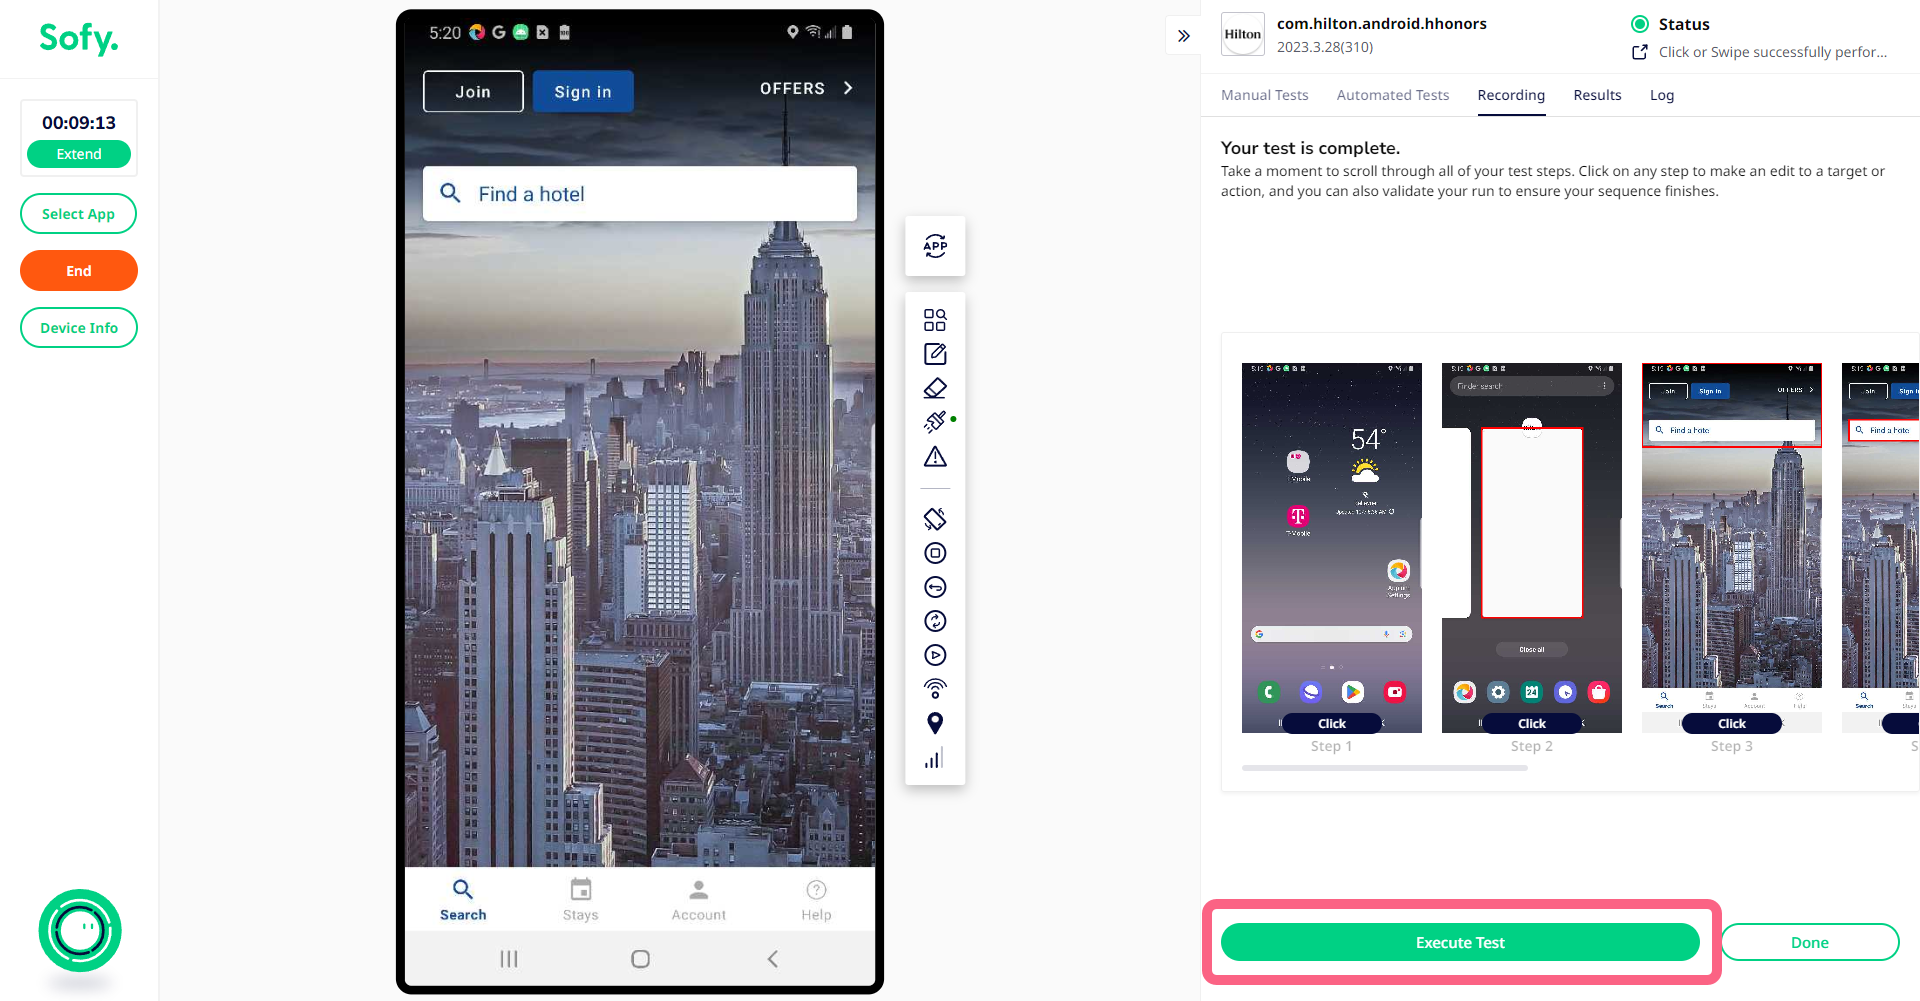
To validate your run and ensure the sequence of steps finishes, click Execute Test. The recording will playback on the device’s screen to the left.
Click Done when you’ve finished reviewing and updating the test.
You can find your saved tests under the Automated Tests tab in the right panel.
 Updated
by
Jessica Holman
Updated
by
Jessica Holman