Consider this: You’ve put in 70 hours of hard work in creating the QA automation scripts for your app’s new login UI. Yet after seeing the results for one sprint, your Product Manager decides to change the UI again. While you’re happy to perform the development again, your face becomes red with angst when you begin thinking about creating those QA automation scripts for the 30 most important customer devices all over again!
Or try this one: It’s testing day. You’re looking forward and going about your testing on Sofy, your favorite no-code QA automation platform, and you accidentally press something on the screen that navigates you to a section that was never a part of your test case. Oops.
Do you have to perform the entire recording process again? To start over—just to undo one mistake?
With Sofy, you don’t have to. Here at Sofy, we’re proud to announce that we’re introducing the ability to edit test cases, so when the UI changes happen (or when you happen to click the wrong buttons), now you can just edit your existing tests with a few clicks, and voila they are all set to run on hundreds of devices again in just a few minutes.
How to edit test cases in Sofy
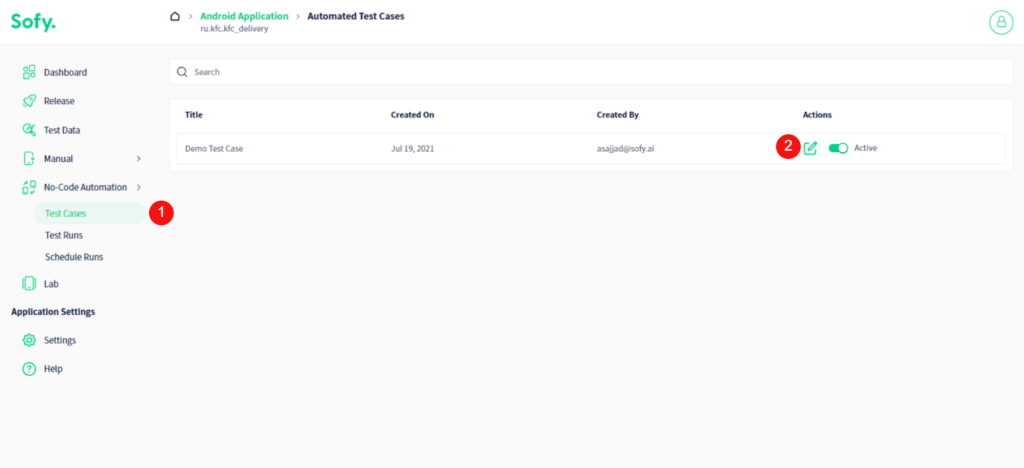
Once you’ve recorded your scenario, make your way to the main portal, click on the “Test Case” (1) option to view all your test cases, and then click on the “Edit” icon (2).
Upon doing so, you’ll see Sofy’s new UX design. This makes things easier for you and your test case editing efforts. For this instance, let’s assume you never wanted to select “Estonia” and instead wanted to select “Russia”. Well, don’t worry, all you have to do is click on that screen (Step 1)
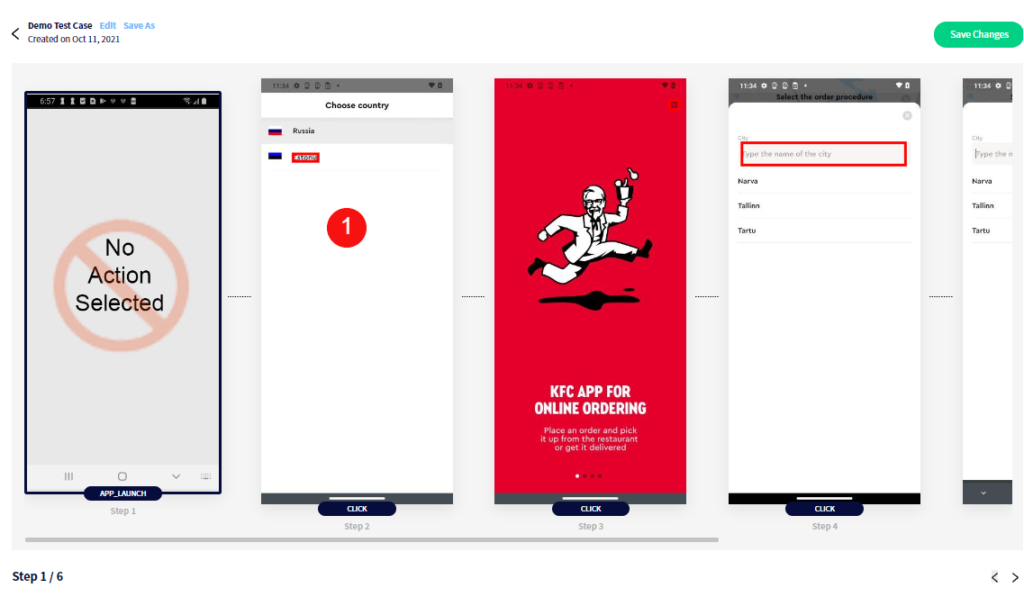
Once you click on it, an “Edit” modal will open up,
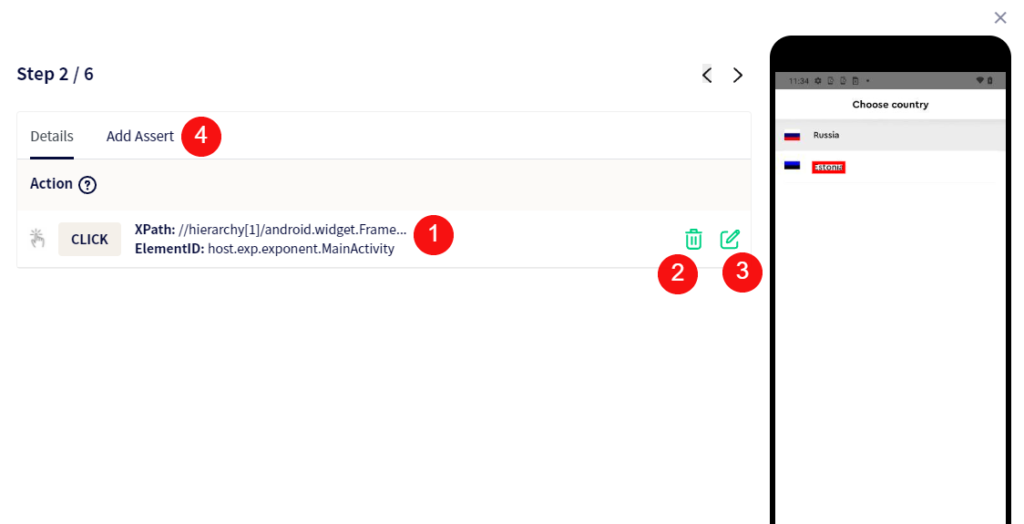
- You can view the information such as the “Element ID” and the “Xpath” itself so you can identify the element Sofy has detected and plans to perform an action on.
- In order to delete the performed action, you can click the trash can icon, and then this action will be removed from the test case altogether.
- Clicking on the “Edit” icon will enable you to change the action performed.
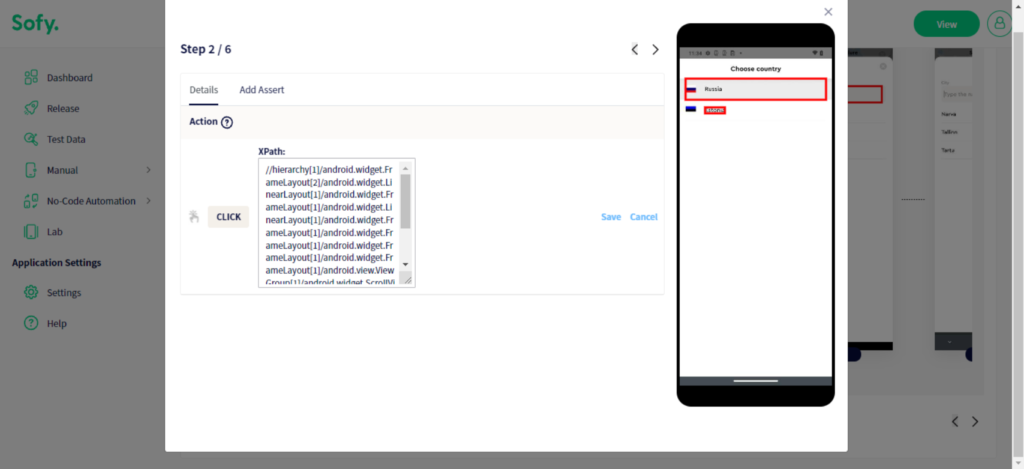
You can hover over different elements and select a new element you want to interact with. In this case, hovering over “Russia” and clicking on it updated the action. Make sure you click on the “Save” button after. Moving forward, instead of clicking on “Estonia”, the click will be performed on “Russia” during playback.
You can also edit the “Xpath’ manually” or add a new “Xpath” directly by manipulating the Xpath field. This will result in the selection of a new element on the device screen.
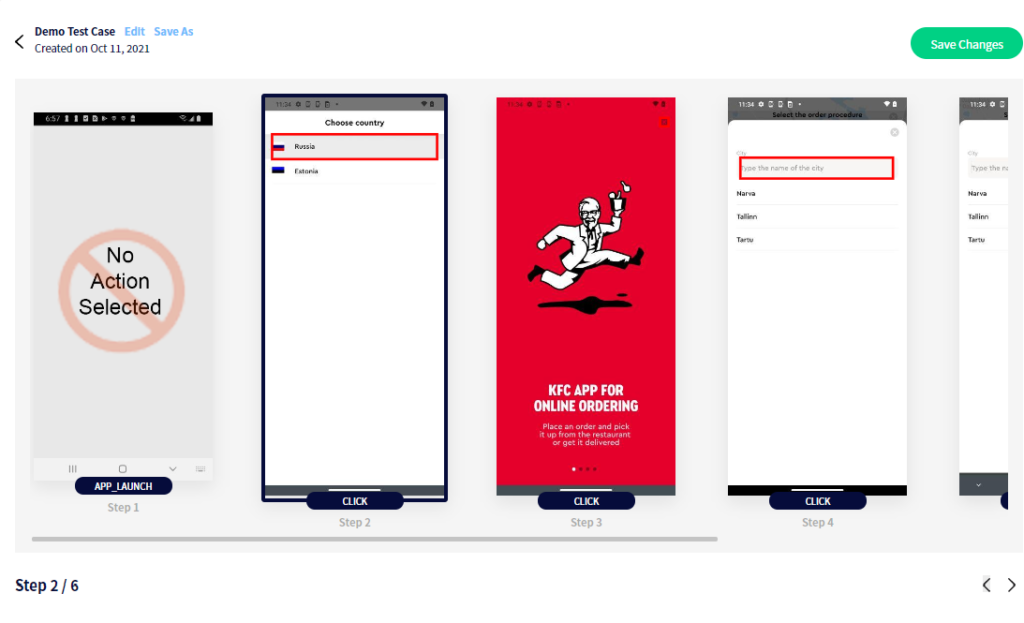
The action of selecting “Estonia” has now been replaced with the action of clicking “Russia”. Once you hit “Save Changes”, Sofy will update this change. Now you’re all set.
4. You can also add an “Assert” during the editing process. Once you do, another step will be added in the view.
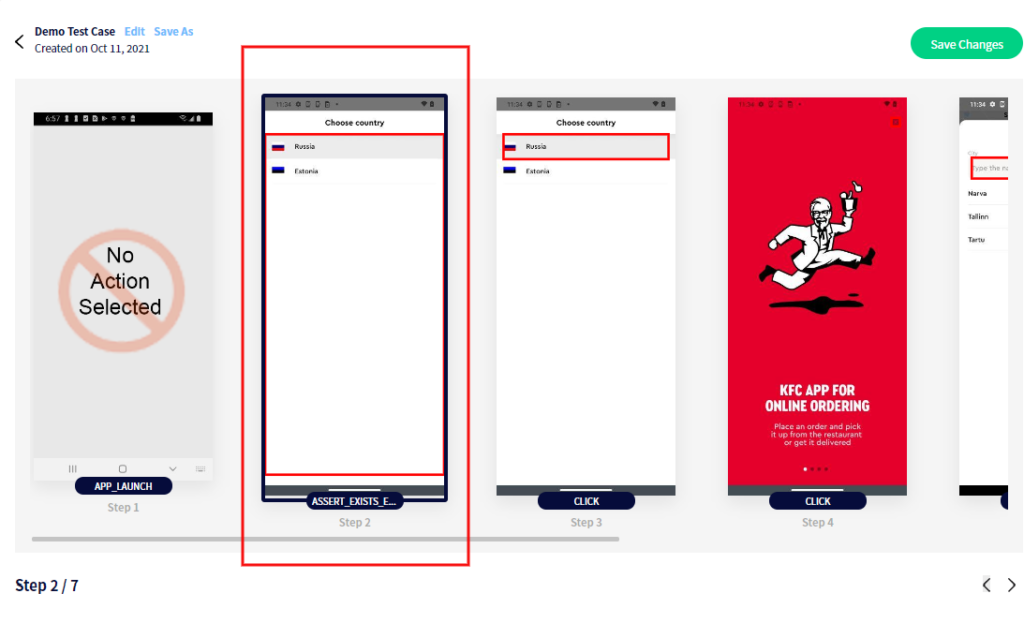
If you want to maintain separate copies of the test case, keep the original and the edited test case in the test case repository. To do this, click “Save As”. This will allow you to store the edited test case with a new name.
This feature also allows you to add static delays, in case of a delayed API response or if you’re waiting for an element to load. You can click here and select the time delay you want to add between two steps.
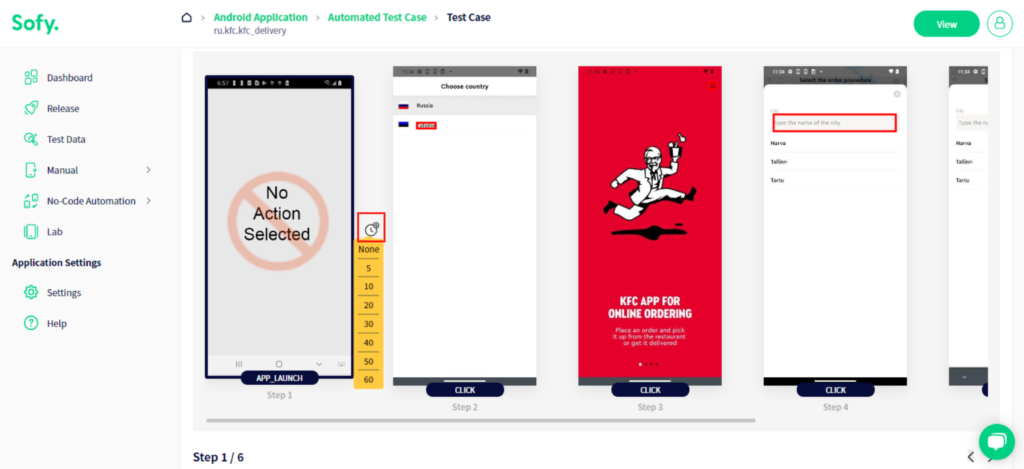
This delay will act as a buffer between the two steps and will be performed by Sofy during playback.
As you can see, in just a few clicks you can now maintain and run your QA automation testing forever. No more maintenance headaches, scrambling through tools and platforms, running tests on ad hoc devices or emulators. Say hello to Sofy!


